¶ Setting up a VPS - Ubuntu 24.04
Acknowledgement: Locking down a VPS is important, especially when you are exposing services or applications.
Additional Note: This article assumes basic understanding of Linux. Also make sure to choose different usernames + listening ports.
¶ Overview
Locking down a VPS (Virtual Private Server) helps protect data, services, and users from unauthorized access and malware. Without good security practices, a VPS can be abused for malicious activity such as ransomware hosting, phishing campaigns, or cryptomining.
If your VPS hosts applications or stores end-user data, securing it becomes even more critical.
¶ Overview of my setup
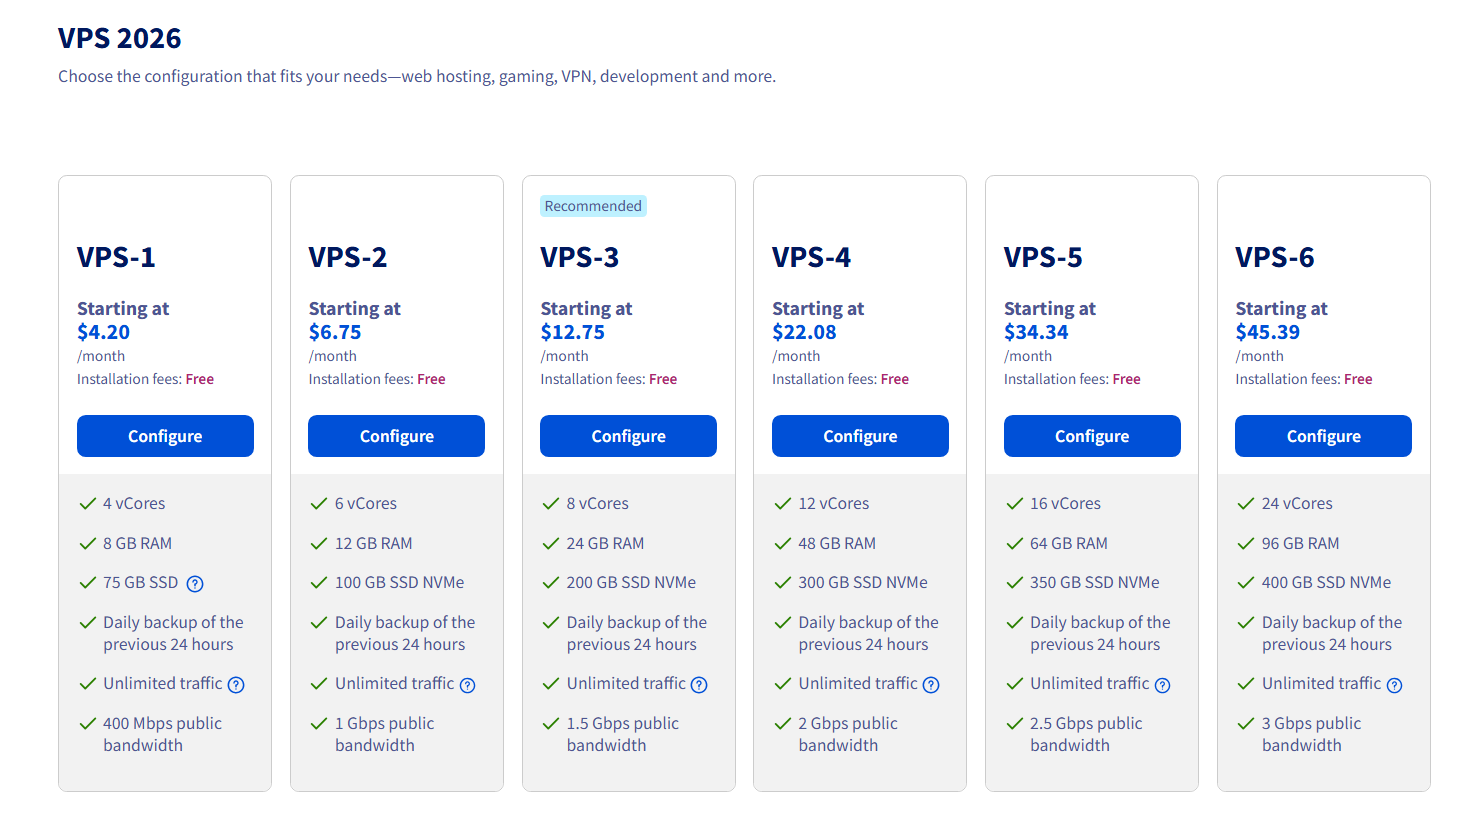
There are many VPS providers, however I am using OVHCloud's 2026 VPS-1 Tier. The same logic can be applied to other providers as well.
¶ First Steps
In the management panel for the VPS, OVHCloud lets you import SSH Keys when installing/reinstalling a OS. Also, they will send a email with a link to a user account that you can use which has sudo access
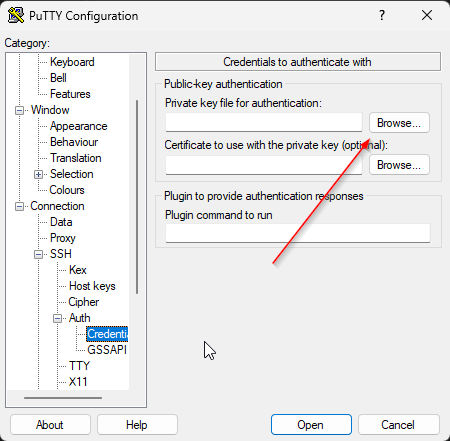
After you get your credentials and details about the VPS, ssh into it. If you did not import a ssh key earlier, we can still add one. I use Windows as a daily driver, and PuTTy since I like the customization that you can do.

Once you get logged into a new VPS, first step is to update the system. They usually come with a fresh os install so it's a good idea to make sure it is updated out of the box.
sudo apt update && sudo apt upgrade -y
sudo reboot now
¶ Setting up SSH Keys for PuTTy
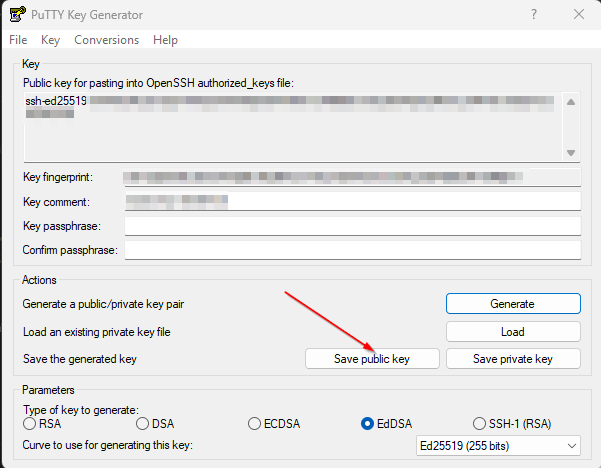
- If you need to setup SSH keys, using PuTTy Gen I typically create an EdDSA (Ed25519) key. You can then upload that new ~/.ssh/authorized_keys file onto the VPS or edit the existing one. Saving the private key so you can use it later to authenticate on your desktop.
¶ Changing default user
- Usually a VPS will ship with a default "Ubuntu" or similar user account that has sudo access, we will create a new user that will be the only account that can log in. For this example, I will create a generic vpsops user. Keep in mind that it will ask for a password to be created, it will be needed later if you use sudo commands.
sudo adduser vpsops
sudo usermod -aG sudo vpsops
sudo rsync --archive --chown=vpsops:vpsops ~/.ssh /home/vpsops
This copies existing authorized SSH keys to the new user while preserving file permissions.
- We want to then completely disable the option to use a password.
Hint: you can edit files using sudo nano.
/etc/ssh/sshd_config.d/50-cloud-init.conf
PasswordAuthentication no
More modifications are needed to the /etc/ssh/sshd_config file.
- Completely turn off passwords:
PasswordAuthentication no. - You can change the default port to a different value, we will use
Port 2738as an example. - Confirm that RootLogin is turned off:
PermitRootLogin no. - Create a new line so only the new account can login
AllowUsers vpsops. - Restart the ssh service.
sudo service ssh restart
Always keep your existing SSH session open when restarting SSH.
Verify key-based login works before disconnecting.
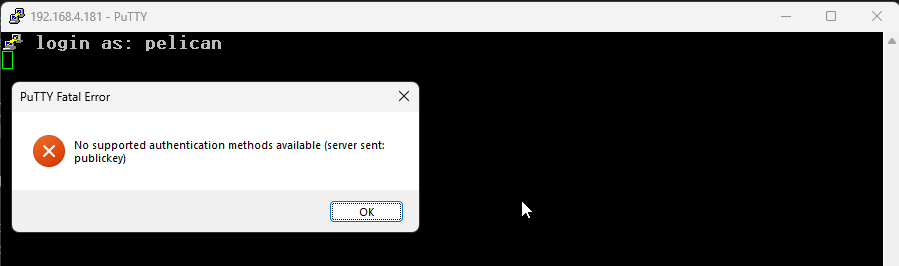
- Neither account can authenticate with passwords anymore, you can test this by trying to ssh into the vps without a ssh key. It should give you a
permission denied (publickey)error.
¶ Further Hardening
Since we setup ssh on a obfuscated port and disabled password logins, we will further secure the VPS. We will use tools like ufw and fail2ban. Fail2ban will automatically ban repeated failures, the "Jails" that you can setup are pretty customizable.

- Change the default rules for ufw.
sudo ufw default deny incoming
sudo ufw default allow outgoing
- Allow the ssh port, my example is
Port 2738. You can confirm the rule is added by sudo ufw status numbered. You might get a "status inactive" if you haven't setup ufw yet.
sudo ufw allow 2738
sudo ufw status numbered
- Existing rules or new rules can be deleted or added using these commands
sudo ufw allow #Port
sudo ufw status numbered
sudo ufw delete #number
- Finally, we can then enable and restart ufw.
sudo ufw enable
sudo systemctl restart ufw
¶ docker
Since we will be using docker containers for some of our apps, we also need to make sure it is installed before we get ufw-docker setup. Later on in my Pangolin Setup Guide, we install Pangolin so we can expose some services publicly and securely.

- Setup Docker's apt repository.
# Add Docker's official GPG key:
sudo apt update
sudo apt install ca-certificates curl
sudo install -m 0755 -d /etc/apt/keyrings
sudo curl -fsSL https://download.docker.com/linux/ubuntu/gpg -o /etc/apt/keyrings/docker.asc
sudo chmod a+r /etc/apt/keyrings/docker.asc

# Add the repository to Apt sources:
sudo tee /etc/apt/sources.list.d/docker.sources <<EOF
Types: deb
URIs: https://download.docker.com/linux/ubuntu
Suites: $(. /etc/os-release && echo "${UBUNTU_CODENAME:-$VERSION_CODENAME}")
Components: stable
Signed-By: /etc/apt/keyrings/docker.asc
EOF

sudo apt update
- Install docker
sudo apt install docker-ce docker-ce-cli containerd.io docker-buildx-plugin docker-compose-plugin
- Confirm it is running
sudo systemctl status docker
- If it is not running, you can start it manually.
sudo systemctl start docker
- You can verify docker successfully installed using the hello-world image.
sudo docker run hello-world
¶ ufw-docker
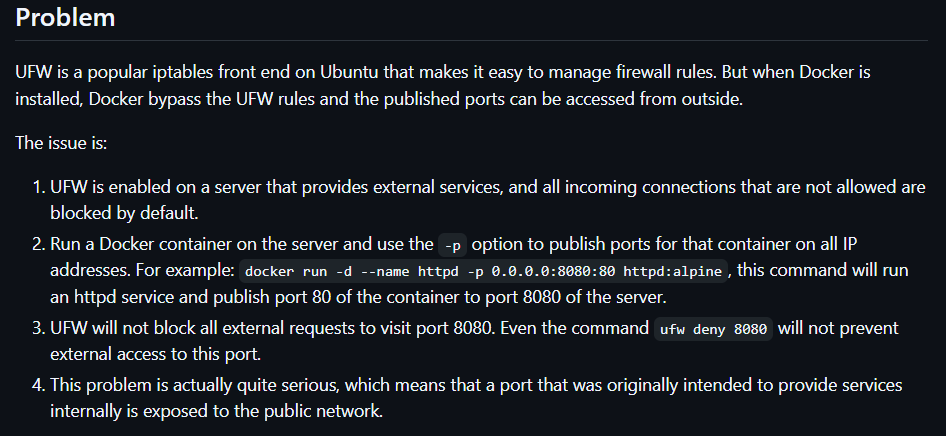
Since we are using docker on our vps, we can setup ufw-docker to make sure our ufw rules are not bypassed. Right now if we start a docker container with a port, it will be allowed and not blocked by ufw. Docker messes with iptables, so this is expected behavior.
You can read more about this here: https://github.com/chaifeng/ufw-docker
- We can install ufw-docker using the commands below:
sudo wget -O /usr/local/bin/ufw-docker \
  https://github.com/chaifeng/ufw-docker/raw/master/ufw-docker
sudo chmod +x /usr/local/bin/ufw-docker

# Install
sudo ufw-docker install

# Restart ufw
sudo systemctl restart ufw
sudo ufw status
New ufw-docker rules can be done by using sudo ufw-docker allow container port/protocol moving forward.
¶ fail2ban
We will be installing and configuring Fail2Ban rules and jails.
Fail2ban is a powerful tool that can help or prevent brute-force attacks as well as repeated failed login attempts. It monitors logs and automatically blocks bad IPs. It uses “jails” to control what gets monitored, how many failures are allowed, and how long each ban last.
- Install fail2ban
sudo apt install fail2ban
- Create jail files
cd /etc/fail2ban
sudo cp jail.conf jail.local
- Here is a example of a /etc/fail2ban/jail.localfile. You can edit the
bantime,findtime, andmaxretryhowever you like in the [DEFAULT] section.
# "bantime" is the number of seconds that a host is banned.
bantime = 10m

# A host is banned if it has generated "maxretry" during the last "findtime" seconds.
findtime = 10m

# "maxretry" is the number of failures before a host get banned.
maxretry = 4
- We can enable fail2ban to work with failed SSH attempts, we can edit the [sshd] section to do that. We also need to edit the port and edit the mode.
[sshd]
enabled = true
mode = aggressive
port = 2738
logpath = %(sshd_log)s
backend = %(sshd_backend)s
- You can whitelist a public IP by adding it to the ignoreip line after
::1. (100.64.0.0/10 is an example IP range)
ignoreip = 127.0.0.1/8 ::1 100.64.0.0/10
- After, we can enable and get the fail2ban service started.
sudo systemctl enable fail2ban
sudo systemctl start fail2ban
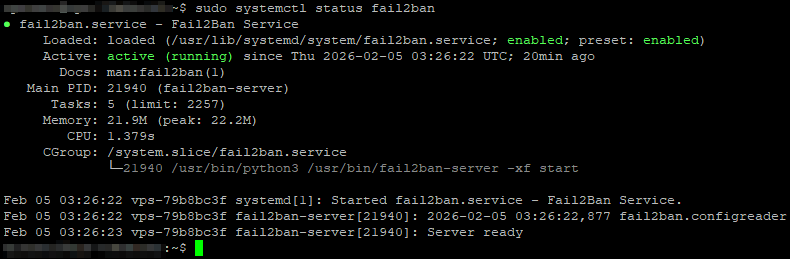
sudo systemctl status fail2ban
- Here is a example image of a successful start should look like.
Fail2Ban Status
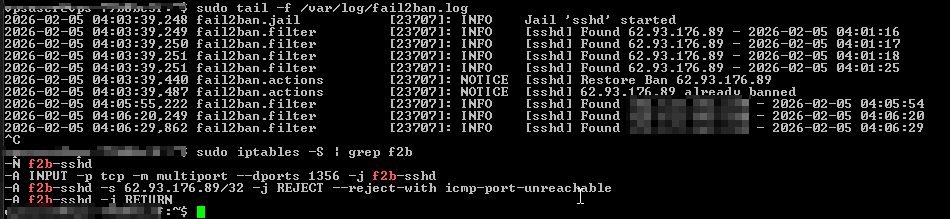
- You can check which jails fail2ban is loading using the command below.
sudo tail -f /var/log/fail2ban.log
Using a VPN or another public IP, you can test and confirm IPs are getting blocked using ssh wronguser@ipaddress -p 2738. After some failed attempts, you can check failed attempts using sudo iptables -S | grep f2b.
- An example ban.
IP Banned
- Reboot the vps
sudo reboot now
- After the vps reboots, we can check all the statuses and make sure ufw,fail2ban, and iptables are looking good.
sudo ufw status
sudo iptables -S
sudo service fail2ban status
¶ Unattended Upgrades
We can setup Unattended Upgrades as well, Unattended Upgrades is set to automatically install security updates only, helping protect the system from known vulnerabilities without manually updating. While it can be expanded to include more updates, I usually avoid that to reduce the risk of stability issues.
# Install
sudo apt install -y unattended-upgrades apt-listchanges

# Enable auto updates
sudo dpkg-reconfigure --priority=low unattended-upgrades
# Choose "yes" to "Automatically download and install stable updates?"

# Optional, this command makes it possible to reboot automatically.
sudo apt install -y update-notifier-common
- Confirming the changes by using cat /etc/apt/apt.conf.d/20auto-upgrades, output should look like the below.
APT::Periodic::Update-Package-Lists "1";
APT::Periodic::Unattended-Upgrade "1";
Customization is done through /etc/apt/apt.conf.d/50unattended-upgrades.
¶ Next steps??
After we get the VPS setup and secured, that will allow us to really get going on some apps and other applications that we may want to setup. I have a guide for Pangolin, that way we can securely access our homelab remotely and also expose some services publicly.
I also list Uptime Kuma, that way we can monitor our services and send a Discord notification to ourselves if something goes offline.